
3D printing is everywhere now. So if you’re thinking about getting into the game, we’d encourage it! It’s a great time to learn! But learning how to level the Ender 3 Max neo is a small hurdle you’ll need to overcome. There is a huge selection of 3D printers out in the wild along with a library of tutorials and buckets of help from enthusiasts in support forums.
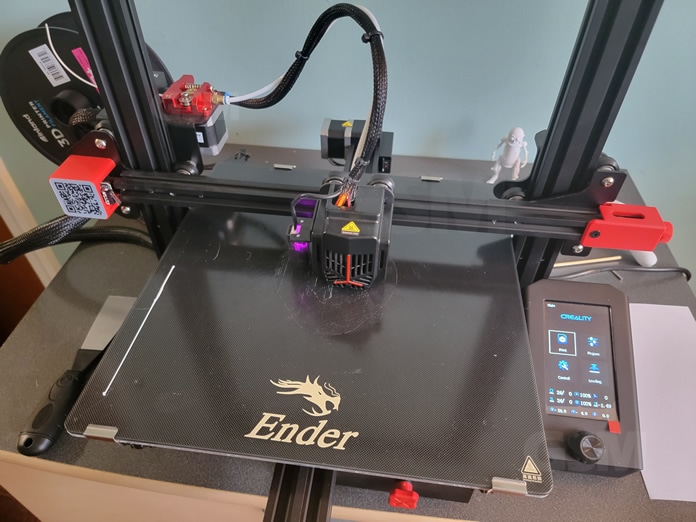
Creality’s Ender 3 Max Neo adds an auto leveling sensor to help with any minor variations in the build plate. Leveling is first and foremost the most important thing you can do and it’s something you’ll need to know how to do often. The printer comes relatively plug and play but you’ll still need to do a good job leveling. Note: Some users choose to re-level after each and every print. 3D printing isn’t an exact science, so your mileage may vary.
Use this quick check list on How to level an Ender 3 Max Neo. Auto Level is a popular feature that is available on many of the newer 3d printers but the basic principles will apply for most consumer grade personal printers.
- Step 1 – select Control > Reset
- Step 2 – select Prepare > Auto Home
- Step 3 – select Move > Move Z
- Step 4 – select Z Offset > Lower Print Head
- Step 5 – Use the Paper Method
- Step 6 – select Prepare > Disable Stepper
- Step 7 – Fine tune the print bed with corner cogwheels
- Step 8 – select Level (auto level), Preheat
This walk-through makes the assumption that you’ve already fed and primed your material and it is ready to extrude.
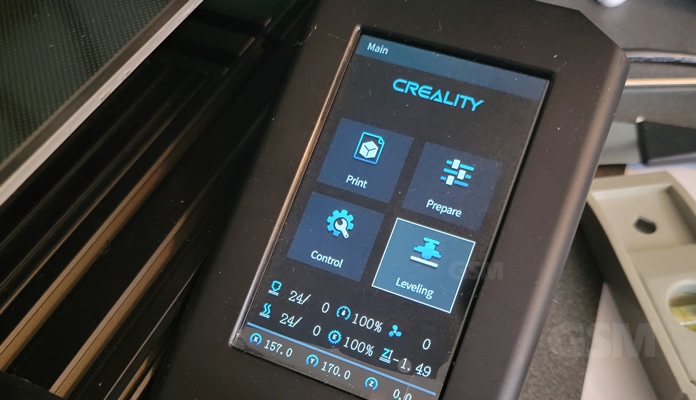
How to level Ender Max Neo
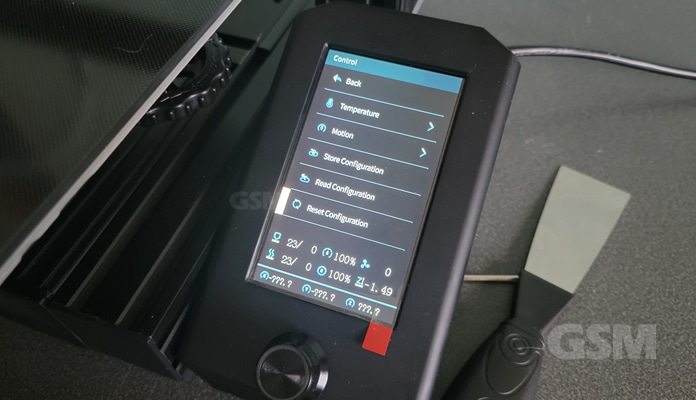
Step 1 – Using the dial, navigate to Control then to Reset. You’ll hear a double chime to indicate the wipe has occurred. This will erase any auto leveling values stored from your last print.
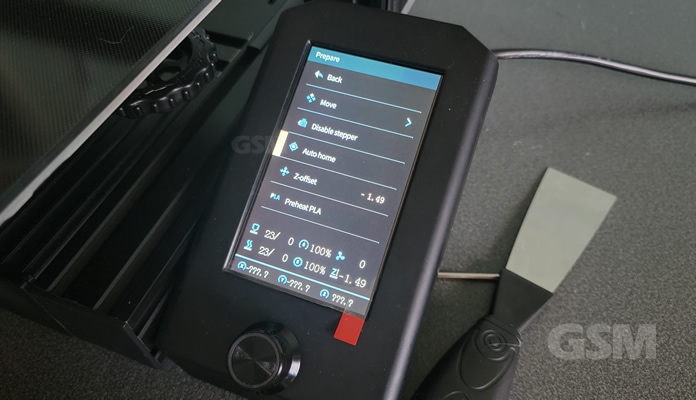
Step 2 – Next under Prepare, select the Auto Home option to center the print head.
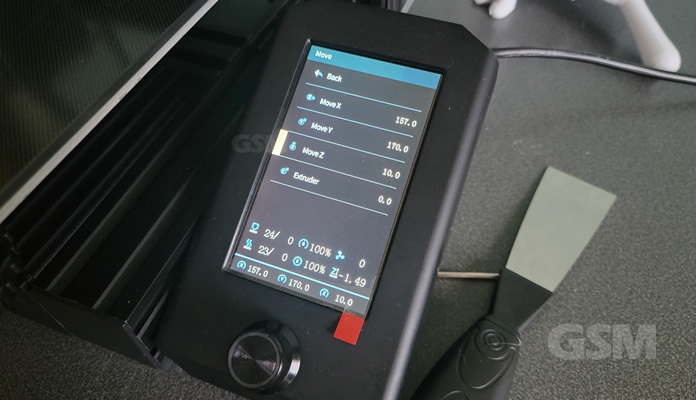
Step 3 – Then under Move select the Move Z option and set it to zero, the print head will lower itself approximately 1cm to the print bed.
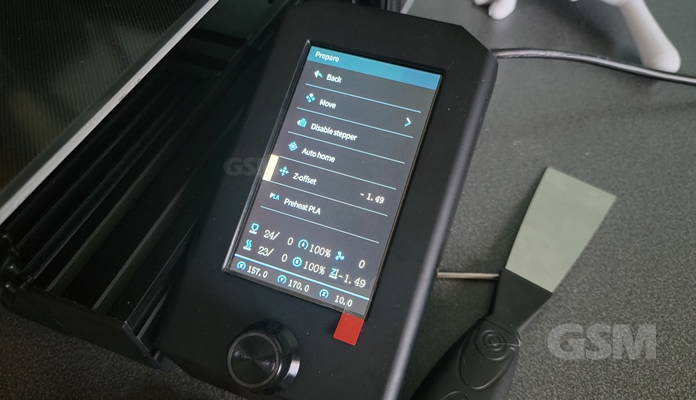
Step 4 – Use the Z-offset option under Prepare to lower the print head even further. Lower the Hot End (print head) to within a cpl millimeters of the print bed.
The Paper Method
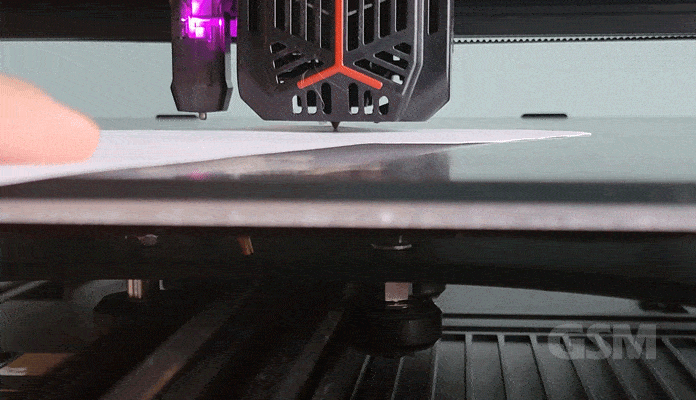
Step 5 – Grab an 8.5 x11″ piece of paper and cut it in half. Place it on the build plate and slide it under the Nozzle back and forth until you get a little friction. Then back the z-offset up a cpl millimeters so the paper slides unrestricted. Do this in the center of the build plate first.
NOTE* the tighter you can get your spacing the smoother your print will come out. However there’s a point at which it is too close or has enough difference that the auto leveling sensor cannot compensate fully.
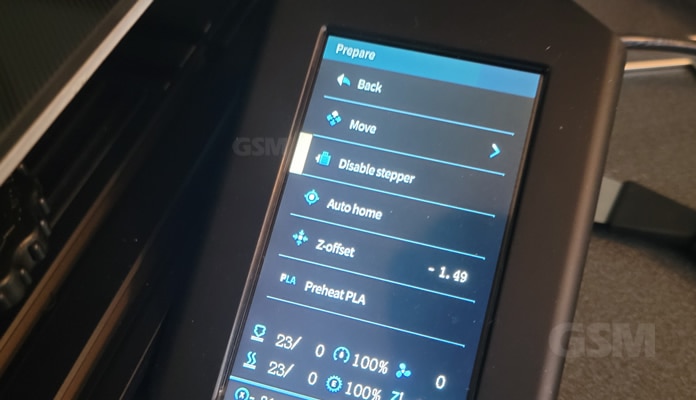
Step 6 – Select Disable Stepper option under Prepare. Visualize the print bed divided into a grid of 6 boxes. (with the stepper disabled) Use a combination of moving the print head and sliding the print bed by hand to each of the 6 areas. You may not be able to get everything exactly even. Get the most consistent spacing you can across all of the areas starting from the middle out.
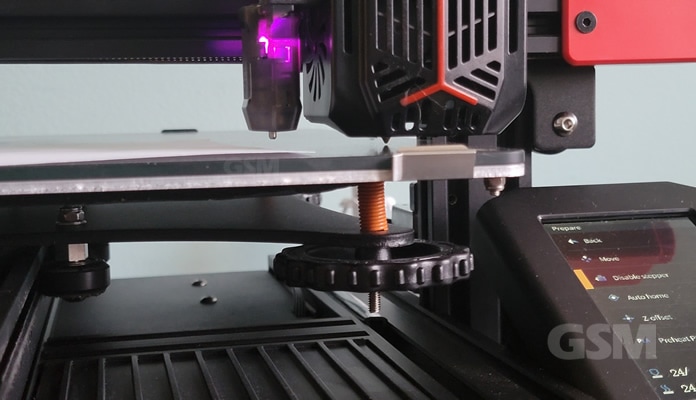
Step 7 – Use the physical cogwheels located on each of the 4 corners to fine tune the build plate corners up or down. Keep going around to all 6 sections and tweak the corner dials so you get the best, most consistent spacing for all sections. There are only 4 cogwheel adjustments, so you cannot tweak everything individually.
You’ll need to keep going back to center and the corners and adjust until you dial it in. You can use the piece of paper method to measure friction when sliding it, then remove the paper and recheck it all again by eye.
If your print bed isn’t completely level and/or you have the print head too close, it will rub against the build plate and cause problems; could even break something.
Step 8 – Finally select Level from the main LCD screen and let it run through it’s auto-leveling process. This measures and then stores any variances into memory. When Auto-leveling completes, select Pre-Heat. Once the print head and print bed both preheat to the set temperature then you’re finally ready to print.
That’s it. Once you familiarize yourself with the process leveling your 3d printer will be a cake-walk.
Troubleshooting
Our build plate must be slightly warped as it is impossible to get all 6 sections exactly spaced. So we’ve averaged it out getting as close as possible center, while keeping as close to the distance on the outer 4 corners as possible. If you find that you’re significantly off by more on one side than the other (left/right side), look to your gantry (the metal framework assembly over your print bed) put a level on it, then move to your print bed and put a level on that; make sure each is level.


